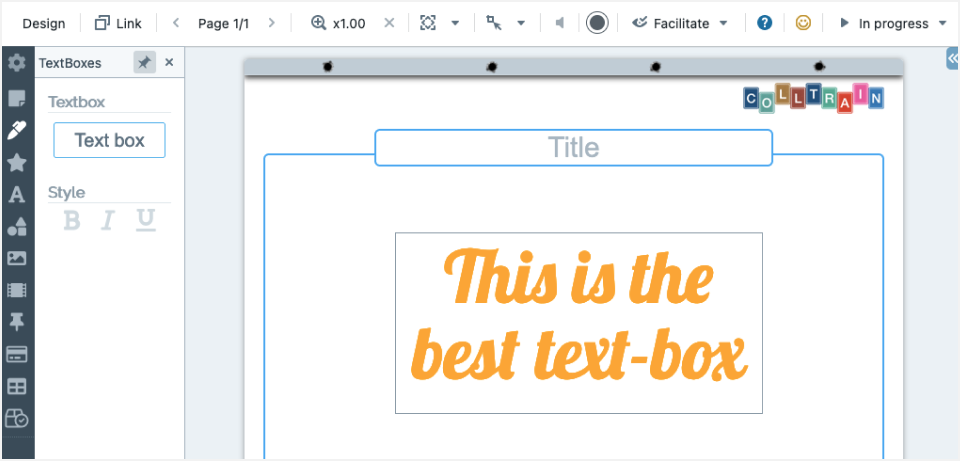
Info: A text box is the object of choice when you aim at creating large texts with huge font size and a transparent background.
How to add a text box #
To insert a text box to your flipchart
- Click on the pencil icon in the toolbar on the left of the screen.
- Choose from the panel that opens the text style you wish to write with (bold, italic, underline) click and drag the “Text box” rectangle (with blue margin).
- Click on “Text Box” on the toolbar
The textbox appears on the flipchart.

How to use the text box #
Basic usage:
- Write the text by clicking inside and start typing
- Resize it by dragging from any of the corners
- Move it around with drag and drop
- Rotate it by moving the mouse pointer near a corner

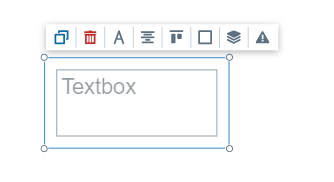
Move the cursor over the text box toward the top side and customize it from the toolbar.
- Duplicate – It allows you to duplicate the existing textbox
- Delete – This deletes the textbox. When pressed, a confirmation box will appear.
- Change typography – Font size, style, text colour
- Horizontal Alignment – The way the text in the box will align vertically
- Vertical Alignment – The way the text in the box will align horizontally
- Border style – You can choose the colour, width, style, and the border’s radius
- Position (front, back, fixed) – in relation to other objects on the flipchart
- Behaviours (see more in the Object Behaviours section).
The list of behaviours is visible when the design mode is enabled.
To enable it, click on the Design menu in the top menu.


