Whether you want to structure a collection of items or compare some elements, you will at some point need to work with tables. This is one way of bringing structure to chaos;)
Prerequisites #
Flipchart-based activity started
Add a table to the flipchart #
To insert a table on a Colltrain flipchart, follow these steps:
- Locate the toolbar on the left of the screen
- Click on the table icon, which is next to last in the toolbar
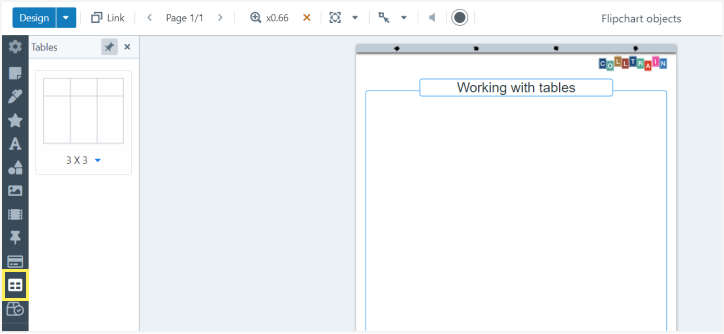
- Click on the table layout in the secondary menu, and the default 3×3 table will be displayed on the flipchart page.
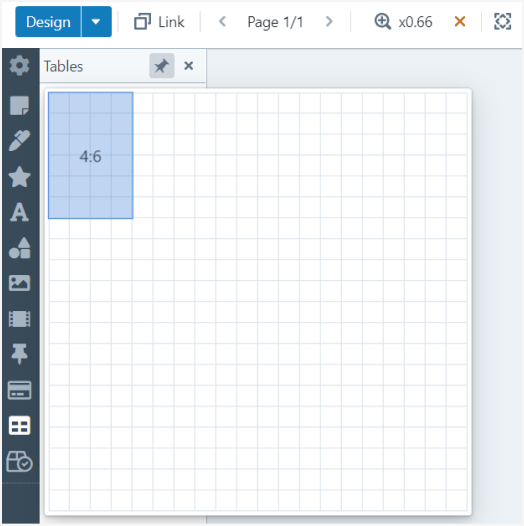
- Click on the 3X3 at the bottom of the table layout in the secondary menu for a specific number of columns and rows.
Then, choose the table size you want by hovering over the extensive layout with your cursor. - Click on the general layout and the already-dimensioned table will appear on the flipchart page.
You can use the table as is or customize it using the following options:
- Adjust the size of the table by pulling the cursor from the bottom right corner.
- Adjust the number of columns and rows after you start editing the table: click on the “+” or “-” that appear on the outside of the rows and columns. The position of the “+” indicates where the new column/row will be inserted.
- Adjust the width of a column or the height of a row by pulling from the sides of one of that row’s/column’s cell
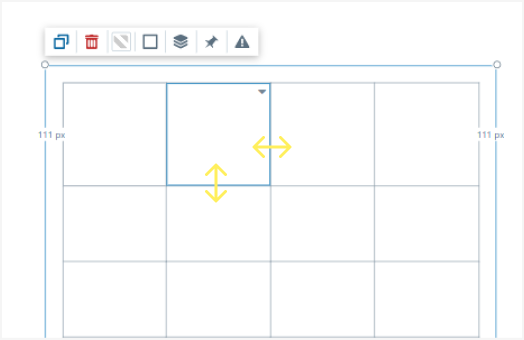
- Duplicate, delete, and change the colour of the cells, the border’s type, colour and weight, and the position of the table (behind or in front of other objects/fixed position): you can find these options in the individual toolbar that appears above the table
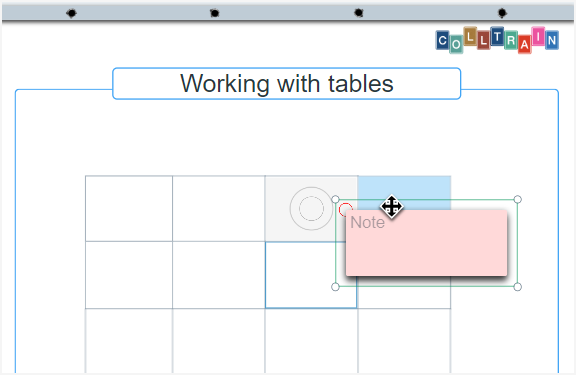
- Allow the table to accept other objects: select from the table’s individual toolbar “Drop target options” (the pin icon) and click on the type of objects you wish the table to accept, in the drop-down list. After that, when you hover the object over the table, the cell will pulsate to signal the fact that it can accept that object.
- Select the type of behaviour(s) the cell should have while accepting the objects:
- Allow “detach” – after the object is embedded in a cell, you can detach it by clicking the red “x” mark that appears in the top left corner of the cell
- Allow “replace” – the object is embedded on top of another object already embedded
- Allow “displace” – the object is embedded by replacing the old one. The latter will be placed outside the cell
- The most common use cases combine “Allow detach” with one of the other two options.
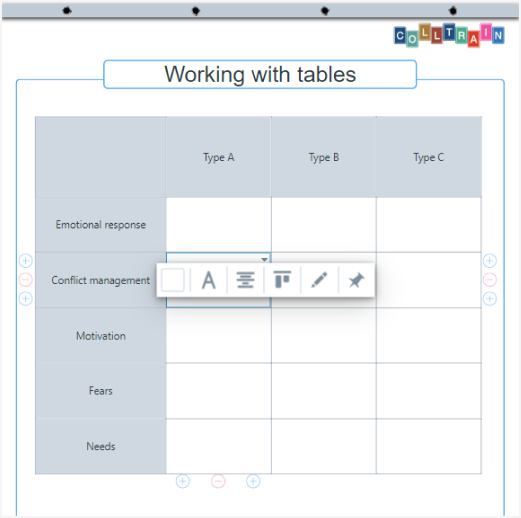
- Edit cells individually: click on the little arrow in the top right corner of each cell to expand the toolbar containing the settings:
- Background colour
- Text Settings
- Text alignment
- Read-only/editable during the activity
- Drop target options. You can keep the same selection for inheriting objects as for the entire table or you can choose another selection. For example, you can choose for some cells not to allow inheriting objects … and this can be very useful if you want to create a crossword puzzle. 🙂
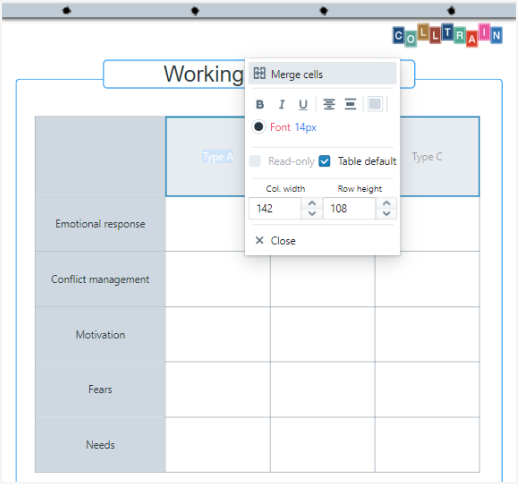
- Edit group of cells: this is useful while editing the header row of the table. To select a group of cells, click on the first cell and then move the cursor over the next cells you want the group to include (they should be next to each other). A comprised menu will then emerge next to this newly formed group, including settings that apply to the whole group:
- Merge cells – after merging the cells, you have then the option to unmerge them
- The settings mentioned above, are applicable to editing the cells individually
- Column’s width, row’s height
Task for you: Add a table to the flipchart and experiment with the table’s properties. Change the format and the behaviours, drop objects into the table, select several cells and merge them.


