Hint: When you need to work with a large number of objects, changing properties one at a time could become a tedious task. Using the Object Browser makes these actions much easier as you can change properties for multiple objects at once.
Prerequisites #
A flipchart-based activity started, Design mode enabled
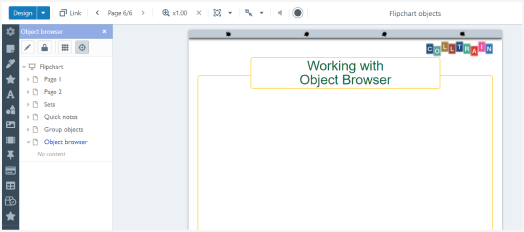
Using the object browser #
Object Browser acts like a control panel that allows the designer to have a quick overview and access to all editing options of the flipchart objects displayed on all activity pages.
To use it, enable Design mode from the top left corner of the screen; then click on the down-facing arrow next to the “Design” button and select the last option from the drop-down list, “Object browser”.
The panel will pop below, on the right of the Object Toolbar.
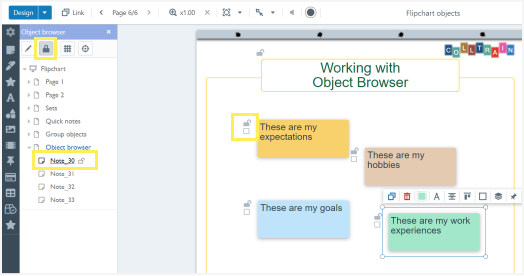
Flipchart object Hierarchy #
Object browser includes a hierarchy of the activity as follows:
The list of pages you have created so far; when you click on one of the pages here, you expand their content – you can see all the objects displayed on that page.
Click on one object and quickly edit it or move it (click and drag) up the list for further reference.
To hide the list of objects on the page, click on the little arrow on the left of the page’s name.
The object browser view and action options #
Four options that you can access at the top of this panel:
A. Show selection inspector
- Click on one of the activity’s pages listed below these four buttons, and then on one of the objects displayed on that page (while in the Browser object).
The object turns orange when selected. - Click the “Show selection inspector” button (the first one on the left) – a new panel will emerge on the right of the Object browser panel.
This includes the editing options available in the individual toolbar of each object (the one that appears on top of the object when hovering with the cursor over it while on the board) and some extra, ones that allow you to edit the objects with great precision – e.g rotation angle at x°, object’s name, etc

- At the top of the Selection inspector panel, you see the following options (from left to right):
- Clear selection
- Delete
- Copy to clipboard
- Cut Selection
- Group
- Copy format
- Paste options
- Drop options – set what types of objects the object you selected can inherit (embed). e.g a note with an icon in it
- Behaviour options – see more on this topic here TBD
B. Show element locks: this enables the locking aspect option to become available to all objects within the activity.
See the lock icon that appears next to that object in the Object Browser (when hovering with the cursor over the name of the object), or in the top left corner of the objects while on the flipchart page (board). When checked, no one will be able to edit it, in or outside the Design mode
C. Show grid: click on the third button at the top of the Object browser to enable the grid over the flipchart pages. The grid guides you when you want to display objects on the page, in a certain alignment with other objects or the page’s frame or header.
D. Snap-to-grid – enables positioning the objects to the closest intersection of the grid, even when the grid visibility is not enabled.


